A clean driveway not only enhances the curb appeal of your home but also prolongs the lifespan of the surface, preventing damage caused by dirt, stains, and organic growth. While professional cleaning services are available, many homeowners prefer to undertake driveway cleaning themselves to save costs and customize the process. This comprehensive guide provides step-by-step instructions on how to effectively clean your driveway, whether it's concrete, asphalt, or pavers. Let’s dive into the process to help you achieve sparkling, well-maintained driveway cleaning surfaces.
Why DIY Driveway Cleaning Is Worth It
Before jumping into the steps, it’s important to understand why DIY driveway cleaning is beneficial:
- Cost-Effective: You save money on professional services.
- Customization: You can tailor the cleaning process based on your driveway type and specific stains.
- Satisfaction: Completing the job yourself gives a sense of accomplishment.
- Maintenance: Regular cleaning extends the life of your driveway and enhances curb appeal.
Types of Driveways and Their Cleaning Needs
Different driveway materials require specific cleaning approaches:
- Concrete Driveways: Susceptible to oil stains, moss, and algae.
- Asphalt Driveways: Usually require gentle cleaning to avoid damage.
- Paver Driveways: Prone to weed growth and staining.
- Brick or Stone Driveways: Require careful handling to prevent surface damage.
Knowing your driveway type ensures you choose appropriate cleaning agents and techniques.
Safety Precautions
Before starting, prioritize safety:
- Wear protective gear: gloves, goggles, and closed-toe shoes.
- Use masks if working with strong chemicals or fumes.
- Keep children and pets away during cleaning.
- Work in well-ventilated areas.
- Be cautious with power washers—use appropriate settings and distances.
Tools and Supplies Needed
Gather these materials before beginning:
- Broom or leaf blower
- Garden hose with a spray nozzle
- Pressure washer (optional but highly effective)
- Scrub brushes (stiff-bristled for concrete, softer for pavers)
- Detergent or cleaning solution (commercial or homemade)
- Degreaser for oil stains
- Baking soda or vinegar for organic stains
- Sealant (optional, for after cleaning)
- Protective clothing and gloves
Step 1: Clear the Surface
Start by removing loose debris:
- Sweep the entire driveway thoroughly with a broom.
- Use a leaf blower for hard-to-reach corners.
- Remove any objects such as planters, furniture, or vehicles.
This step ensures that dirt and leaves don’t get embedded during washing.
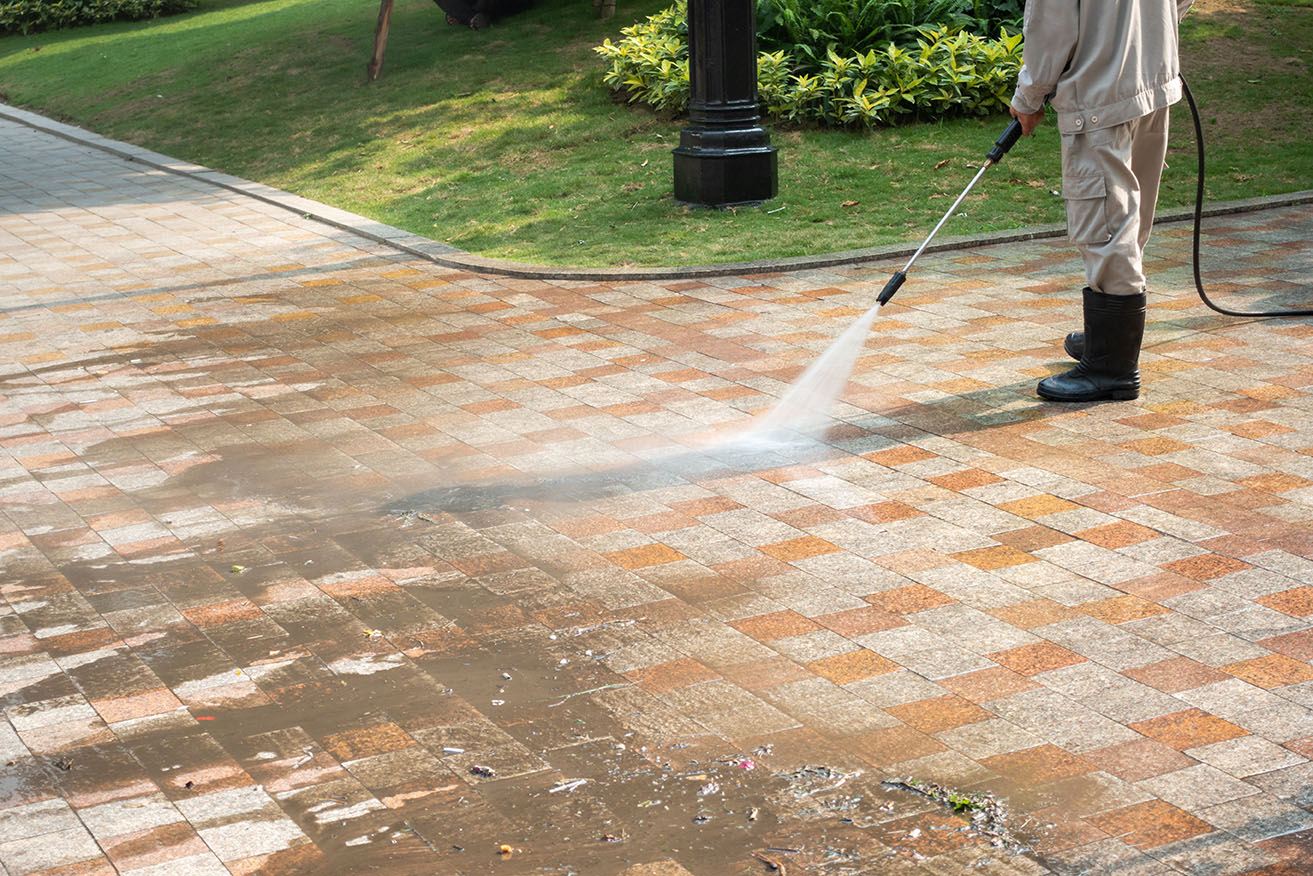
Step 2: Rinse the Driveway
Use a garden hose with a spray nozzle or a pressure washer on a low setting:
- Rinse the entire surface to loosen dirt and grime.
- Focus on areas with moss, algae, or stains.
- Avoid high-pressure settings initially to prevent surface damage.
A thorough rinse prepares the surface for cleaning agents, making subsequent steps more effective.
Step 3: Apply Cleaning Solution
Choose an appropriate cleaning method based on your driveway type and stain:
For General Cleaning:
- Mix mild dish soap with water.
- Apply with a scrub brush or broom.
- Let it sit for 10-15 minutes before scrubbing.
For Oil and Grease Stains:
- Use a commercial degreaser or make a homemade solution:
- Homemade degreaser: Mix baking soda and water into a paste.
- Apply directly on the stain.
- Let sit for 15-20 minutes.
- Scrub with a stiff brush.
For Organic Growth (moss, algae, mold):
- Use a mixture of vinegar and water (1:1 ratio).
- Alternatively, purchase a commercial moss or algae cleaner.
- Spray generously over the affected areas.
- Let sit for 15-20 minutes.
For Stubborn Stains:
- Use a concrete or paver-specific cleaner.
- Follow manufacturer instructions regarding application and dwell time.
Step 4: Scrub the Surface
Using the appropriate brush:
- Scrub the entire driveway or targeted stained areas.
- Use firm, consistent strokes for stubborn stains.
- Pay special attention to edges and corners where dirt accumulates.
This mechanical action helps lift dirt, oil, and organic matter from the surface.
Step 5: Rinse Thoroughly
After scrubbing:
- Rinse the entire driveway cleaning with a garden hose or pressure washer.
- Use a high-pressure nozzle for deep cleaning but avoid excessive pressure that could damage the surface.
- Ensure all cleaning agents and loosened dirt are washed away.
Thorough rinsing leaves the surface clean and ready for inspection.
Step 6: Address Persistent Stains
If stains persist:
- Repeat the application of cleaning solutions.
- For oil stains, consider applying a poultice made from baking soda and water, covering with plastic wrap, and letting it sit overnight before rinsing.
- For moss or algae, a second round of vinegar solution may be necessary.
Persistent stains may require multiple treatments or professional intervention.
Step 7: Dry and Inspect the Surface
Allow the driveway to dry:
- Open windows or doors to speed up drying.
- Check for any remaining stains or damage.
Inspect the surface for unevenness or cracks, which may need repair.
Step 8: Seal the Driveway (Optional)
Sealing provides added protection against stains, water infiltration, and weather damage:
- Wait at least 48-72 hours after cleaning to allow the surface to dry completely.
- Choose a suitable sealant for your driveway material.
- Apply evenly using a roller or sprayer.
- Follow manufacturer instructions regarding drying times and reapplication intervals.
Sealing enhances the driveway’s appearance and longevity.
Maintenance Tips for a Cleaner Driveway
- Regularly sweep to prevent debris buildup.
- Rinse with water periodically to remove light dirt.
- Address stains promptly to prevent setting.
- Reapply sealant every 2-3 years for maximum protection.
- Trim nearby plants to reduce moss and algae growth.
Consistent maintenance reduces the need for intensive cleaning sessions.
When to Call Professionals
While DIY cleaning can handle most issues, consider professional help if:
- You have extensive oil stains or deep-seated stains.
- The surface is severely damaged or cracked.
- You lack the necessary equipment like a pressure washer.
- Organic growth persists despite treatment.
Professional services can provide deep cleaning, repairs, and sealing with specialized equipment and expertise.
Final Thoughts
DIY driveway cleaning is a manageable and cost-effective way to maintain your property’s curb appeal. By following these step-by-step instructions, you can effectively remove dirt, stains, moss, and algae, leaving your driveway looking fresh and well-maintained. Remember to prioritize safety, choose appropriate cleaning agents for your surface type, and perform regular maintenance to keep your driveway in top condition. With a bit of effort and the right tools, your driveway can remain a welcoming feature of your home for years to come.
Let's Connected
Name: ProWash Wellington
Address: 10 Halifax Street, Wainuiomata, Lower Hutt, Wellington 5014
Phone: 022 132 3578
Map: maps.app.goo.gl/9WqdNZV8b16KxjqU7